Boozy Big Apple Galette

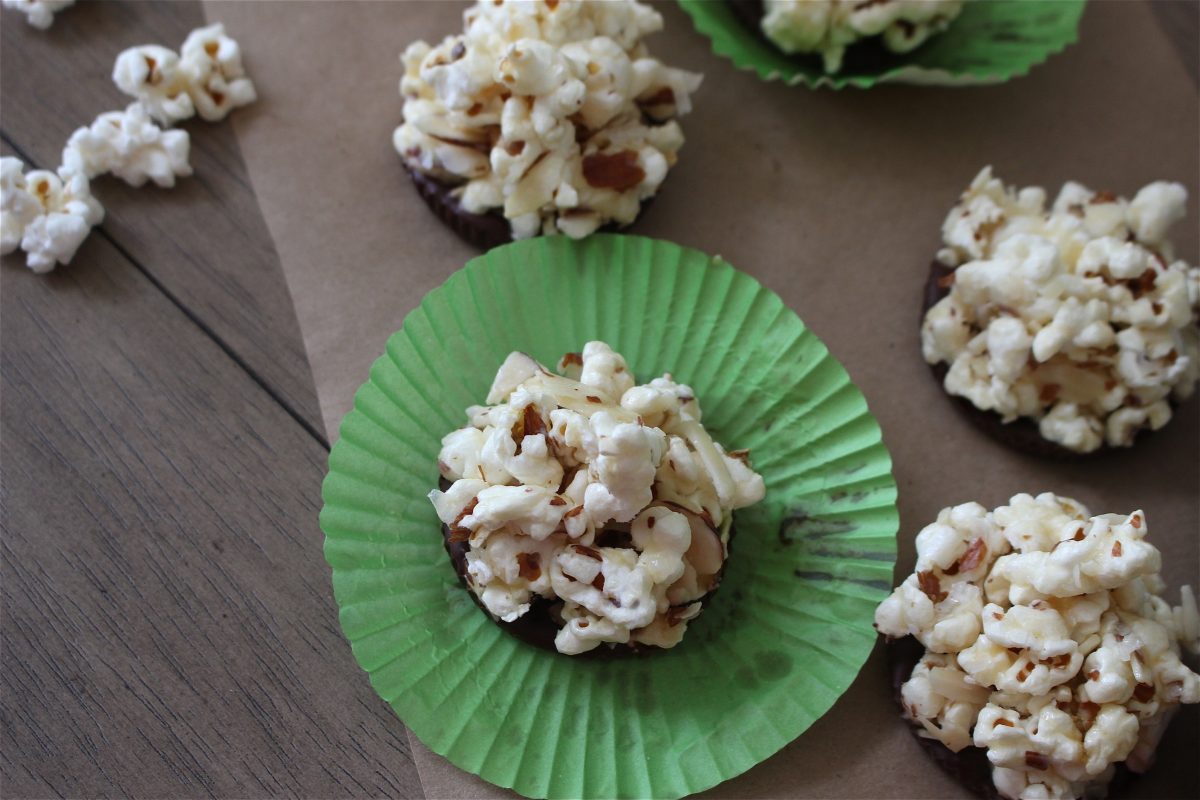
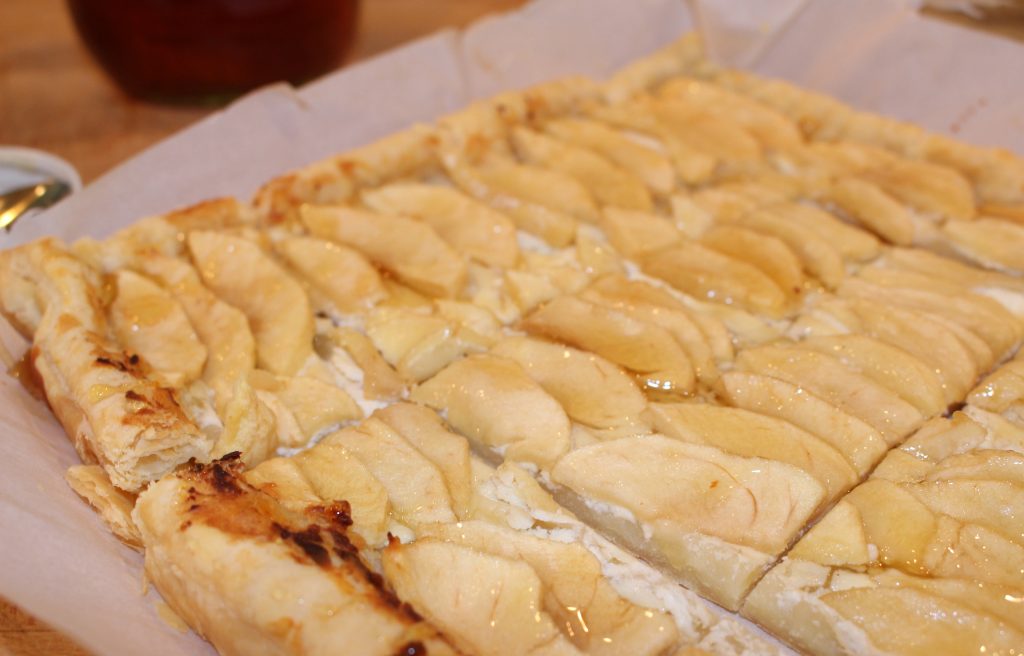
The newest season of “The Housewives of New York City” Bravo series has just come to an end and the Reunion starts tomorrow. I don’t know about you, but the New York City Housewives are by far the best batch. Between the drunken rants and the chaotic engagement, I can’t decide which is my favorite moment this season. All I know is that these women are going to have one intense reunion. In honor of those brazen women I give you a Boozy Big Apple Galette.

Boozy Big Apple Galette

Ingredients:

Dough:
1/8 tsp. Salt
1 c. Flour
1/4 c. (heaping) Coconut Oil
4 tbl. Almond Milk

Mix all the ingredients in a large bowl. Once the dough forms a ball, place it between two sheets of parchment paper and roll it out. Set the dough aside until you are ready to make the galette.

Filling:

2 Big Apples
1/4 c. Whisky
2 tsp. Coconut Oil
2 tbl. Maple Syrup
1 tsp. Cinnamon
1/4 tsp. Cloves
1/4 tsp. Nutmeg

Preheat the oven to 350 degrees.

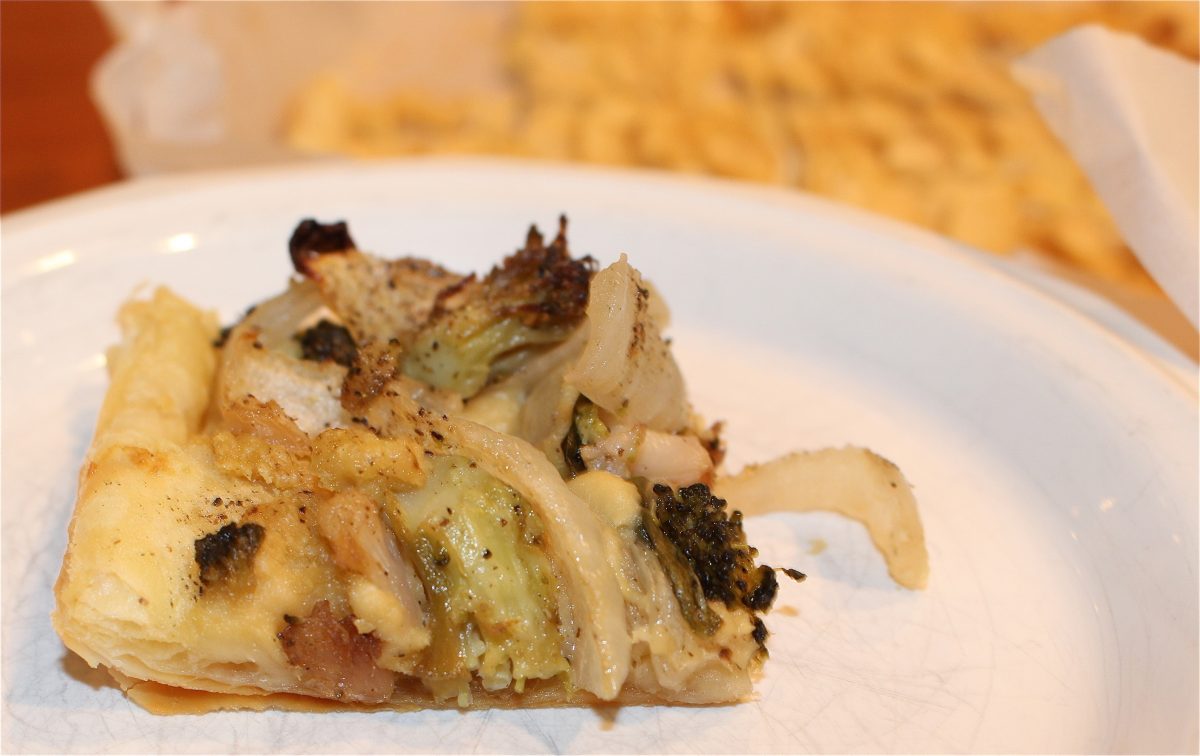
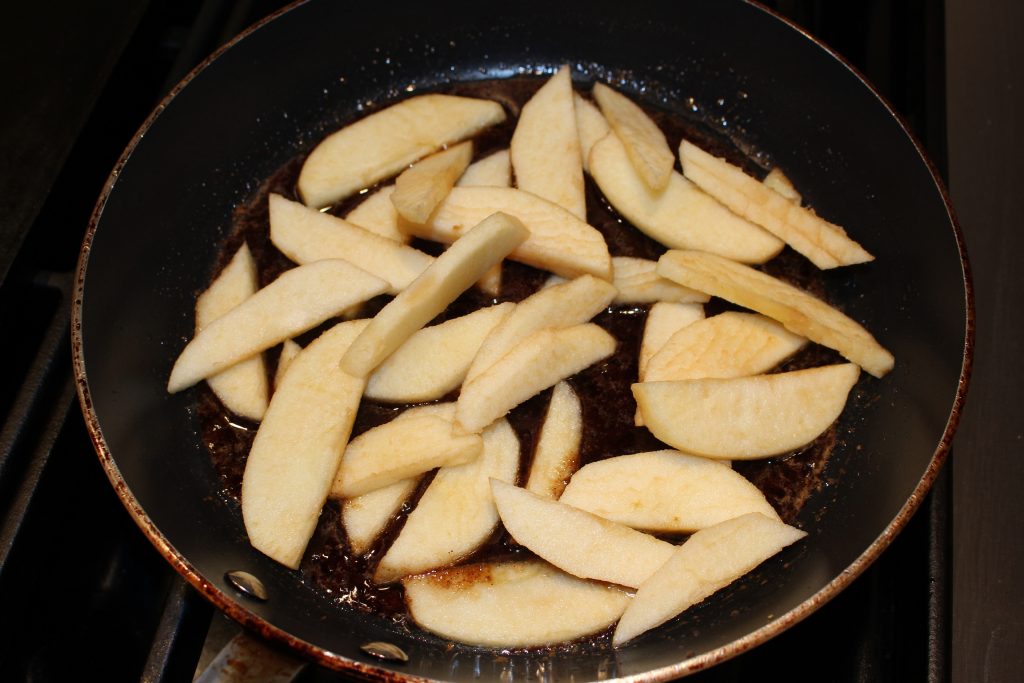
Begin by peeling and slicing the apples. In a large pan place the coconut oil, whiskey, maple syrup, cinnamon, cloves, and nutmeg and simmer on low heat. Add the apples slices to the pan and coat the pieces thoroughly. Once the liquid has thickened and the apples are coated remove it from the heat.
IMG_2978

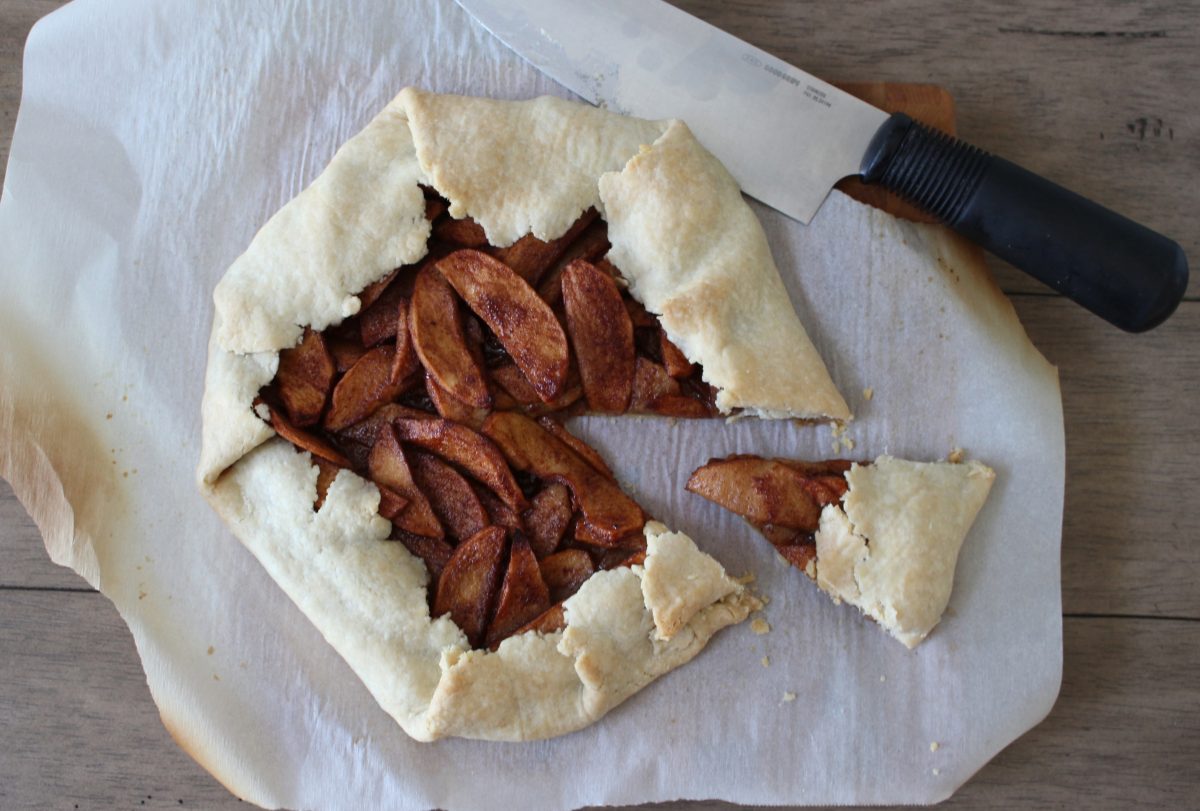
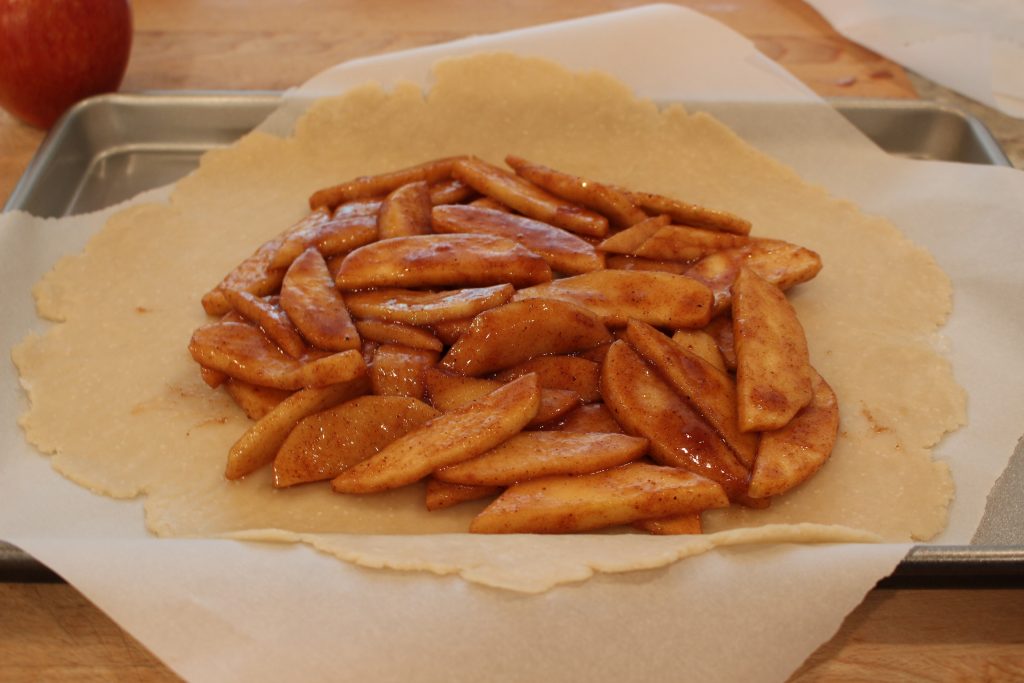
Remove the top parchment paper from the dough and place in on a baking sheet. Pour the pan’s contents on to the center of the dough, pouring any additional liquids over the apples, and fold the ends of the dough over the apples.
IMG_2987

IMG_2990

Bake for about 55 minutes or until the dough is a golden brown.

Popcorn Sliders

Summer is almost over but that doesn’t mean there isn’t any more fun to come! One of my favorite things on rainy summer days is to binge watch movie after movie. Comedy, Black and white, Drama, if its on, I’m watching. Before Labor Day hits and everyone goes back to their regularly scheduled lives, it’s time to round up the troupes to have a few more get togethers. Next movie night create some fun with these popcorn sliders.

Popcorn Sliders

Ingredients:

For popcorn:
1/4 c. Popcorn
1/3 c. Popcorn Kernels

For Sliders:

6 c. Popped Popcorn
1/2 c. Coconut shreds
1/2 c. Almond Slivers
1/4 c. Coconut Oil
1/2 c. Honey
1/2 tsp. Salt
1/2 tsp. Almond extract
1 1/2c. Chocolate (dealers choice)
Cupcake Liners

Makes 12

IMG_2873

If you’ve never popped your own popcorn, it’s pretty easy. Place 1/4 cup coconut oil into a large pot, heat on low. Place three popcorn kernels in the oil and put a lid on it. Wait till all three kernels have popped. If the kernels are taking a while, turn the heat up slightly. Once all three test kernels have popped, pour 1/3 cup of popcorn kernels into the pot and cover with a lid. When the popping starts to slow, remove the pot from the heat and allow it to rest until the popping completely stops. Put the popcorn in a large bowl and sprinkle with salt. Now you’re ready!

In a microwavable bowl place 1/4 cup coconut oil and 1/2 a cup of honey. Heat until the ingredients have melted, about 30 seconds. Once they are melted, add 1/2 teaspoon of almond extract and mix.

Remove any of the kernels that haven’t popped from the popcorn bowl. Add 1/2 cup of almond slivers and 1/2 cup of coconut shreds to the popcorn and mix Next, add the honey mixture to the popcorn mixture and thoroughly coat the popcorn.

Spoon a small amount of chocolate onto the bottom of lined cupcake tins. Pile popcorn onto the chocolate, making sure to push the popcorn down into the chocolate. Place the cupcake tins into the freezer, so that the chocolate can harden.

Once the chocolate is set, take them out of the freezer and enjoy!
IMG_2886

Clara’s Lemon Lavender Soufflé

Today’s recipe is dedicated to THE Soufflé girl, Clara Oswald from Doctor Who. Although her soufflés never quite turned out as expected, she will forever be known as Soufflé Girl. I was a little leery of her when she first popped up on the scene but she has since proven herself. For that, I name this week’s recipe after her, Clara’s Lemon and Lavender Soufflé. Here’s hoping she’ll figure out how to make them eventually.

Clara’s Lemon and Lavender Souffle

Ingredients:

4 Eggs (separated)
1 Extra Egg White
1/2 c. Coconut Milk
1 Lemon (zested and juiced)
1/4 c. Sugar
1 tsp. Dried Lavender
A Pinch of Salt

Makes 8 Small ramekin soufflés

Preheat the oven to 375 degrees

In a food processor ground 1/4 cup of sugar and 1 teaspoon dried lavender.
IMG_2697

Whisk together egg yolks, zest, flour, and sugar. On a low heat, bring the coconut milk to a boil. Remove from the heat and slowly add it to the yolk mixture. Remember to whisk constantly so that the eggs don’t cook.

Once the milk is incorporated into the egg mixture, add the lemon juice and pinch of salt. Place the mixture back into a small saucepan and heat on low. Continuously stir until it becomes thick. Remove it from heat and set aside. Allow it to cool before folding in the eggs whites.

Whip four egg whites until they form soft peaks. When the yolk mixture has completely cooled, fold in the eggs whites. Pour the soufflé mixture to the top of the ramekins. Glide your finger over the edge of each ramekins so that soufflés rise.

Bake for about ten minutes, or until the soufflés rise and start to brown. Remove from heat and dust with confectioners sugar. Serve immediately so that the soufflés don’t fall.
IMG_2711

Dairy Free Lavender Shortbread Cookies

Lavender is one of the great bounties of summer. Blueberries, blackberries and rain aren’t that bad either, but lavender takes the cake, and tastes great in cake! Well in today’s case, it takes the shortbread. Let them eat shortbread! Who needs real bread? Not me. No more sandwiches! Just cookies. Now, that’s a philosophy I can get on board with! These dairy-free Lavender Shortbread cookies will make you forget you gave up dairy products and are having nightly cheese dreams…. Just me?

Dairy-Free Lavender Shortbread Cookies

Ingredients:

1 1/2 c. All Purpose Flour
1/2 c. Sugar
1/2 c. Coconut Oil
1 tsp. Dried Lavender
1/8 tsp. Salt
2 tbl. Ice Water
1/2 tsp. Vanilla

Make sure the coconut oil is at room temperature and in solid form.

In a food processor grind a half cup of sugar and one teaspoon dried lavender. Once the lavender has been ground up and thoroughly mixed with the sugar, place it in a medium bowl. In the same bowl, add the room temperature coconut oil. Cream the oil and sugar together and add vanilla.
IMG_2635

In a separate bowl, whisk together the flour and salt. Pour the coconut mixture into the flour and mix. Add two tablespoons of ice water and begin to form the dough.

Next, place the dough in parchment paper and roll into a tube. Refrigerate the dough for a half hour.
IMG_2638

Preheat the oven to 350 degrees. After the half hour has passed, remove the dough from the fridge and slice into quarter-inch slices. Place the slices on a cookie sheet and put them in the top third of the oven. Bake for eighteen minutes. Once the cookies’ edges begin to turn brown remove it from the oven and allow them to cool at least five minutes on the sheet until you transfer them to a cooling rack.
IMG_2667

Blueberry Lemon Pop Tarts

Blueberry Lemon Pop Tarts

The top three childhood foods have to be Mac and Cheese, Fruit Loops and of course, Pop Tarts. Honestly, these foods still make frequent guest star appearances in my life. Pop Tarts are just a tried and true staple that is there for you in times of need. Its that best friend you can count on in any situation. Did I just call Pop Tarts my best friend? I guess I did and you know what? I am not ashamed. A girl could do worse. And in that case, I’m giving my best friend a little make over. Blueberry Lemon Pop Tarts anyone?

Crust:
2 c. Flour
1 Egg
1/3 c. Sugar
1 Stick and 2 tbl. Butter
1 1/2 tsp. Salt

Filling:
1 1/2 c. Blueberries
1/4 c. Water
1/3 c. Sugar
1 1/2 tbl. Flour
1/2 tbl. lemon Zest
Pinch of Salt

Begin by making the crust. Mix all the dry ingredients in a large bowl. Blend in butter until the mixture forms small crumbles, then add the egg. Once the dough is formed, place in the refrigerator and chill.

Next step is to make the filling. Place blueberries, water, sugar, lemon zest, and salt in a small sauce pan, simmer on medium heat. When the blueberries begin to break down, and soften add the flour to thicken the mixture. Once the filling has thickened and the blueberries have completely softened, take it off the heat and refrigerate.

IMG_2480

IMG_2482

Once the blueberry filling has cooled, remove the filling and crust from the fridge. Roll out the dough and cut it into eighteen, 4×3 rectangles. Place half of the rectangles on a parchment lined baking sheet and spoon blueberry filling in the middle of each rectangle. Place another dough rectangle on top and crimp closed.
IMG_2490

IMG_2496

Bake at 350 degrees for fifteen minutes or until the edges start to turn golden brown. Allow the Pop Tarts to cool completely until adding the icing. Combine confectioners sugar, water and food dye together and pour on top of the Pop Tarts. And don’t forget the sprinkles!

Summertime Tarts

Summertime and the living is easy…. so lets not make it complicated with confusing meals, shall we? Two easy tarts for any summer time dinner, or for those guests that stop by unexpectedly. Store bought puff pastry with fruits and veggies, almost as easy as a frozen dinner. And yes, you heard me right. Store bought, pre- made puff pastry. Sorry Martha, some of us work…. So, it’s time to clean out your crisper and dive into some tasty tarts.

Apple Goat Cheese Tart

Ingredients:
Puff Pastry
2 Large Apples
2 tb. Honey – extra for serving
3 oz. Goat cheese

Begin by preheating the oven to 350 degrees. Peel two apples and thinly slice them. In a square, parchment paper lined pan, place one of the square puff pastries. Spread softened goat cheese on the uncooked pastry dough and top with apple slices. Drizzle two tablespoons of honey on the apples and baked for fifty minutes, or until the edges turn golden brown.

When the tart is finished cooking, drizzle more honey on top and serve.

IMG_2319

Roasted Vegetable and Hummus Tart

Ingredients:
Puff Pastry
1 Large Onion
1/2 c. Broccoli
1/2 c. Cauliflower
2 Hand fulls of spinach
Original or traditonal Hummus
Olive Oil
2 tb. Red Wine Vinegar
Black Pepper
Powder Garlic

*The great thing about this recipe is that you can add almost any vegetable and it will be amazing.

Preheat the oven to 350 degrees. Place broccoli, cauliflower, spinach, and onion in a baking pan. Toss with olive oil and red wine vinegar and season to taste with pepper and garlic. Roast for thirty minutes. Once the vegetables are finished baking, place puff pastry dough into a square, parchment lined pan. Spread hummus on the unbaked dough and add roasted veggies. Drizzle olive oil and season again with garlic and pepper. Bake for fifty minutes or unit the sides start to turn golden brown.

When the tart is finished remove it from the oven and allow to cool for five minutes before serving. Trust me when I say,” Wait five minutes”…. the roof of your mouth will thank you.

IMG_2336

Berry Swirl Frozen Yogurt

Berry Swirl Frozen Yogurt

Winter might still be coming on Game of Thrones, but summer is officially here! Throw on your flip flops, bathing suits, and floppy hats, because it’s time for some fun in the sun. While you start dipping your toe in the sun bathing pool, you’ll need a friend to keep you nice and cool! How about a sweet and refreshing treat? Real strawberries, blueberries and yogurt? Yep, you’re ready for it. Berry Swirl Frozen Yogurt. So easy and delicious! Jon Snow would hand in his furry cloak to sit pool side for this recipe.

1 c. Strawberries
1 c. Blueberries
1 tb. Sugar
4 tsp. Honey
1 c. Greek Yogurt

Preheat the oven to 350 degrees. Separately, roast one cup of blueberries and one cup of chopped strawberries for fifteen minutes.
IMG_2164

Using two bowls, place half of a cup of greek yogurt and two teaspoons honey. Once the berries are finished, add blueberries to one bowl and strawberries to the other.
IMG_2167

With a hand mixer, whip the yogurt mixture until the berries are completely blended.

Line a loaf pan with plastic wrap and pour the two bowls of yogurt on separate sides of the pan. Swirl the two sides together, using a fork, and freeze the yogurt over night. By the morning you’ll have delicious frozen yogurt!
IMG_2177

Eggy Rice Bowl

A long time ago, in a galaxy far far away….. or a least a place that seems galaxies away from where I live now, there was an asian-fusion restaurant that served delicious, spicy rice bowls. Sigh, how I miss that crowded little eatery. But I do have a solution! My own creation, although not exact, will conquer any spicy, rice bowl craving. The masses have spoken! They demand more eggy rice bowls! How could I possibly deny the masses something so delicious? It’s merely my civic duty. Enjoy.

Ingredients:

3 Garlic Cloves
1/2 Yellow Onion
1/2 c. Dry Rice
6 Bacon Strips
3 Handfuls of Spinach
2 Eggs
Ground pepper
Garlic Powder
Salt
Cayenne Pepper
Sour Cream

First thing’s first, rice must be made! Using your favorite rice, cook half a cup of dry rice following the instructions found on the package. Once the rice is cooked, set it aside.
IMG_2085

On a baking sheet place six bacon strips, and cook at 400 degrees for sixteen minutes, or until they are brown and crispy.
IMG_2110

Chop the onion and garlic cloves and place them in a sauce pan. Using olive oil, sauté them until the onion becomes translucent. Season with a pinch of salt and some ground pepper and add the spinach. Cook until the leaves are ready and the onions begin to brown on the edges.
IMG_2113

Next, add the reserved rice and two pats of butter to the pan. Mix on medium heat. Crumble in four strips of bacon and finish mixing the rice mixture. Remove the pan from the heat and spoon the rice into two bowls.

Now, we’re in the home stretch. Fry two eggs using butter and season both with pepper, garlic powder, and cayenne pepper. When both eggs are cooked, place one on top of each rice bowl. Garnish with the remaining bacon strips and a dollop of sour cream.

Chard Roll-ups

Chard Roll -ups

With Summer coming in hot, and my winter bod still hanging around, it’s time to get down to business. The last week was filled with carnival goodies, and summer treats but, after a week of eating greasy delights, I’m ready for a change! This month I am going to be focusing on healthy food that not only fills you up, but also doesn’t make you guilty for having that second piece. And like the Fugees’ once said “Ready or not here I come, you can’t hide. Going to find you and make you want me.” And you are definitely going to want these Chard Roll-Ups.

Ingredients:

1/2 Small Onion
1 Garlic Clove
5 Small leaves of Basil
4 Large Leaves of Chard
1/4 tsp. Garlic Powder
1/2 tsp. Pepper
3/4 Part Skim Milk Ricotta Cheese
Pinch of Salt
1/2 c. Shredded Mozzarella
Olive Oil

Begin by chopping and sautéing the onion, and garlic. Once the onions are translucent remove them from the heat and place in a medium mixing bowl. Chop the Basil and add it to the onion mixture. Next, add Ricotta Cheese, garlic powder, pepper, salt, and mozzarella to the mixture and set aside.
IMG_2030

Preheat the oven to 350 degrees. While the oven is preheating, rinse the Chard leaves and pat them dry. Cut each leaf’s stem away and coat each leaf half with a little bit of olive oil.
IMG_2037

Now, it’s time to begin stuffing the leaves and rolling them up. Using the Cheese mixture, that was set aside, spread an equal amount on every leaf and roll them up like a sleeping bag.
IMG_2047

Place on a baking pan that has been coated with olive oil and allow to bake for fifteen minutes.

These make great snacks, or apps for parties without all the guilt. Enjoy!

White Meringue Squirrels

White Meringue Squirrels

I haven’t always been a fan of squirrels. In fact, they have always scared me! You see, when you go to a college where squirrels feel like it’s their birthright to sneak attack you and steal your food, you might be too! After years of restless nights, the tides have changed and believe it or not, those little fur babies have grown on me. Now, I find myself living in a town that celebrates their white squirrel population. And I am about to part take in my first White Squirrel Festival. Yep, a whole three days to bask in the glow of their squirrely goodness. So, in anticipation I’ve made meringue white squirrels. It’s time to join in on the fun and make your own!

Ingredients:

3 Eggs Whites
Pinch of Salt
3/4 c. Confectioners Sugar
1 tsp. Fresh Lemon Juice
1/2 tsp. Almond Extract
Chocolate for decorations

Preheat the oven 250 degrees.
First step in making these meringue squirrels is to separate the eggs. Make sure not to get any yokes in the whites. Place the egg whites in a stand mixer with a whisk attachment. Whisk the eggs at medium speed until the eggs begin to bubble. Add the salt and continue to whisk. Next, pour in the lemon juice and mix.
IMG_1924

Increase the speed and slowly add the sugar. Once all the sugar is incorporated add the extract. Allow the eggs to whisk on high until they begin to form stiff, glossy peaks.

Using a piping bag, pipe the meringue out onto a parchment paper lined baking sheet. Pipe one small circle, then another larger one under the first but slightly to the side. Finish by adding the “S” shaped tail.
IMG_1911

Bake for about thirty minutes or until the sides begin to get color. Once the meringue starts to tan turn the oven off. Leave the baking sheet in the oven until the meringue’s are hardened. When all the squirrels are cooled add a chocolate nose and eye.
IMG_1970